Next on the virtual house tour is a visit to the second floor. If you have not already done so, reviewing the
house plan might help put these images into perspective.

 Above
Above: This is the main entrance of the Hall Chamber, with the landing just beyond the door. Hall Chamber is an old term for master bedroom. Just below this room, on the first floor, is the Hall (Great Room, Keeping Room, or Sitting Room), which was the main gathering area for the family, and what we might think of today as being a combination of a formal living room and dining room. Opposite the Hall was a minor room called the Parlor. So the two upstairs bedrooms just above the Hall and Parlor were sometimes referred to as the Hall Chamber and Parlor Chamber, respectively. Just to the left and above the door is a finished (boxed-over) post-and-beam assembly (the west end of bent #3 in the floor plan).

 Above left:
 The second floor landing, looking into the Parlor Chamber. Another finished post-and-beam is visible here.
Above right: The floor of the landing looks very old, but the boards are narrower and have straighter cuts than the original planks. The Hall Chamber flooring is nearly identical to that of the landing. My guess is that these are replacement floors that were laid down sometime in the nineteenth century. Given the higher elevation of the Hall Chamber's floor, the original planks might still be underneath.

 Above left:
 Another view of the landing, rail, and a very naked butterfly table.
Above right: The view down the stairs....watch your step! :-)

 Above left:
 This doorway is just above the stairs and open to the chimney area.
Above right: Inside the Parlor Chamber, looking back toward the landing.

 Above left:
 Floor planks in the Parlor Chamber.
Above right: North corner of the Parlor Chamber with another finished post-and-beam (part of bent #1) and 9/6 and 12/8 windows.

 Above left:
 The other end of the Parlor Chamber and the interior post of the bent.
Above right: Corner of the Parlor Chamber looking toward the Spinning Room. The closed door on the right is another doorway into the chimney area.
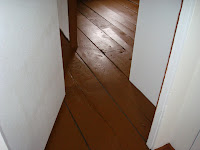
 Above left:
 Floor at the junction of the Parlor Chamber, Northeast Chamber, and Spinning Room.
Above right: This is the Northeast Chamber, which was in the process of being converted to a second floor bathroom and has quite a bit of exposed plumbing. I may eventually complete this conversion, but am not totally decided on whether or not I want the Northeast Chamber to serve as a bath, as the partition defining this room is one of the oldest interior structures in the house. Furthermore, the existing floor joists could never support heavy bathroom fixtures. They would need to be sistered with modern dimensional joists or steel. So I will not be making any decisions along these lines for some time yet.

 Above:
 Two more views of the Northeast Chamber.

 Above left:
 View facing out the door of the Northeast Chamber into the Spinning Room and the Southeast Chamber just beyond.
Above right: The interior of the Spinning Room, with two exposed posts on each side of the window.
Above left: A close-up of one of the posts. This is the Northeast exterior post of bent #2. Note the two draw pegs in the tie-beam. The vertical steel rod was added some time back in the 1940's-1950's to provide more stability to the beam just below.
Above right: The other exposed post. I would bet that, just on the other side of the visible portions of these posts and tie-beams, classic English tying joints are holding the posts, beams, wall plate, and principal rafters together.
Above left: An old L-nail protrudes from one of the Spinning Room tie-beams.
Above right: A view of the Spinning Room floor and doorway to the Southeast Chamber.


Above left: View from the Spinning Room into the Southeast Chamber.
Above right: The closed brown door on the right conceals the attic stair.

 Above
Above: Looking into the Southeast Chamber. Finished post-and-beam and 6/6 window.
Above left: A very old and very small closet door. Above right: East-facing 12/8 window.
Above: Floor planks in the Southeast Chamber.

 Above left:
 Stool and broken planking just beyond.
Above right: Junction of Hall Chamber closet, Southeast Chamber, and Spinning Room.

 Above left:
 Looking back into the Spinning Room from the Southeast Chamber.
Above right: Closed doors in the Southeast Chamber.


 Posts
Posts


 I have a large, colonial-style trestle table. It's hardly an antique, having been made recently in Malaysia, but I think it's rather nice. With a large table top and channels, it has plenty of room for computer periperals and tends to hold things in place. And its heavy weight keeps it still. The only drawback is that, having been manufactured in an environment of consistently high heat and humidity, the climatic variations of New England cause quite a bit of visible wood movement. The table top, in particular, is slightly bowed in several spots. It lacks breadboards at the ends, and the fact that the top was laminated out of many different sized blocks of wood doesn't seem to make it any more stable. But I love it nonetheless.


